
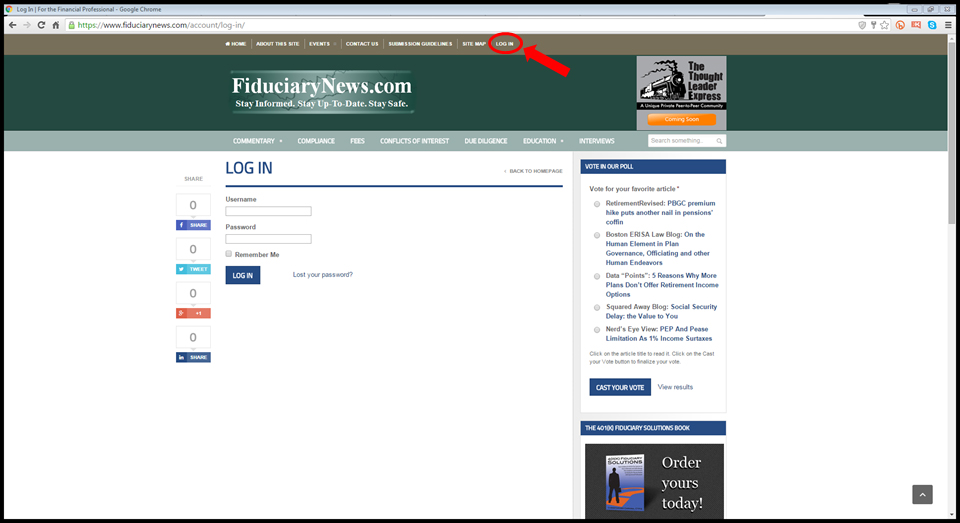
Step #1: Go to the navigation bar at the top of the masthead (with the brown background) and click “Log In.” The Log In page appears and enter your username (i.e., your email) & the password you selected. If you can’t remember your password click “Lost your password?”
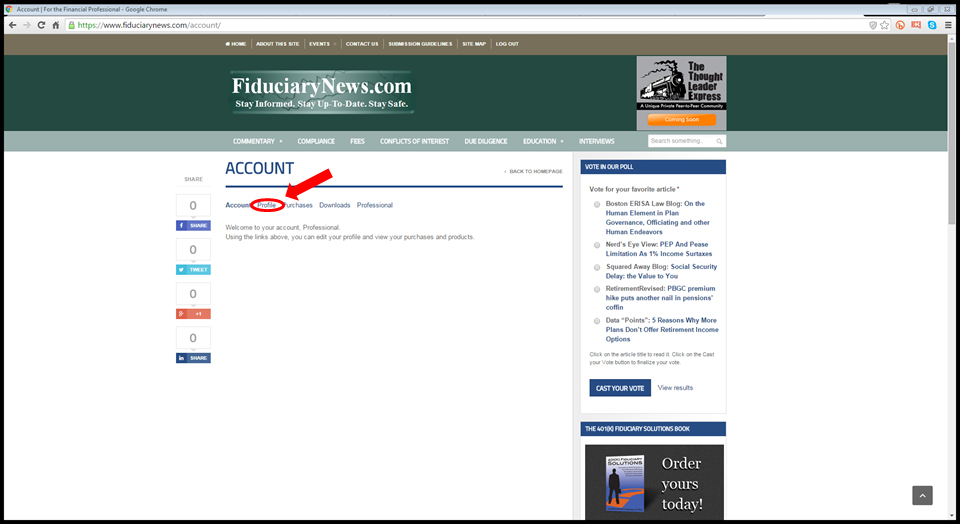
Step #2: When you log on, your account page pops up. Hit “Profile” and the magic begins.
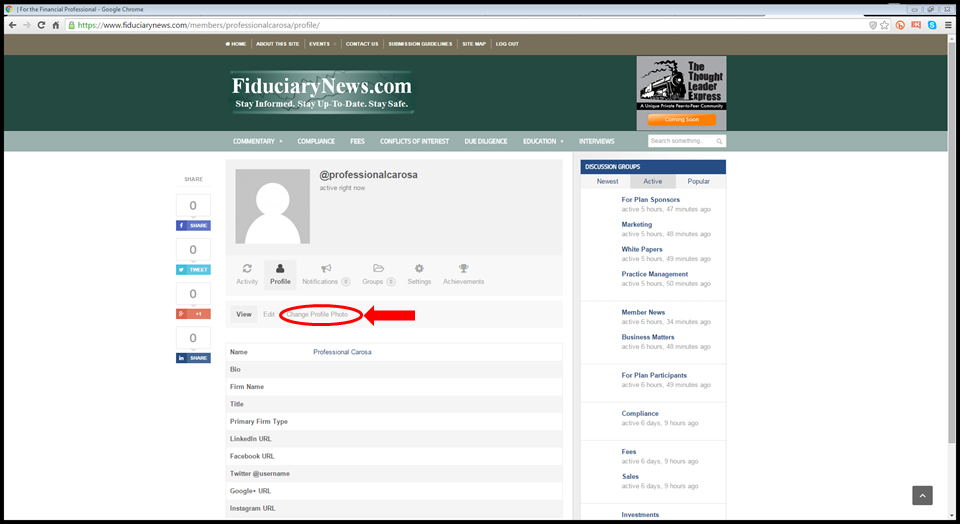
Step #3: Your Profile page appears. Your first task is to update your Profile Photo. Click “Change Profile Photo,” which is circled in red in the screen shot below.
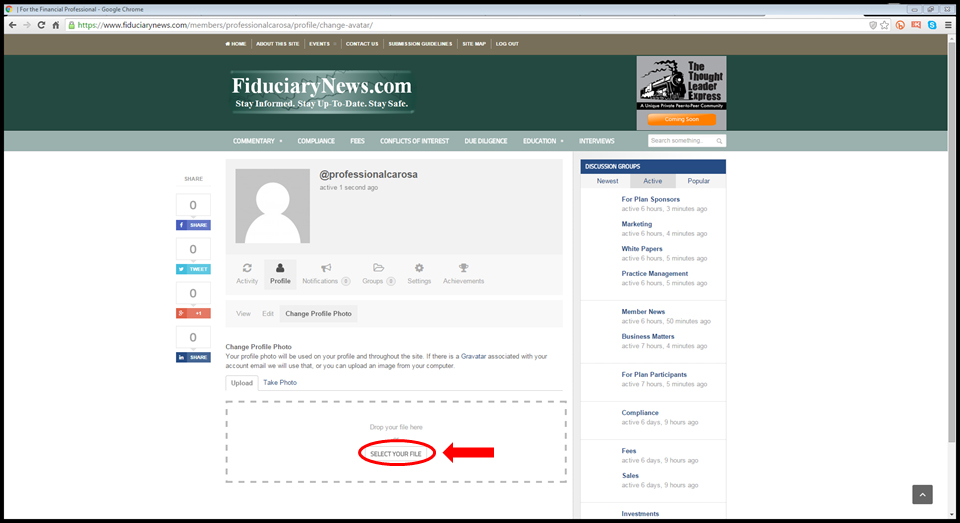
Step #4: Your Change Profile Photo page appears. If you have an Avatar you’re happy with you’re done. However, we recommend you use a professional picture. To upload the photo, click “SELECT YOUR FILE” and select the file of the photo from your own files.
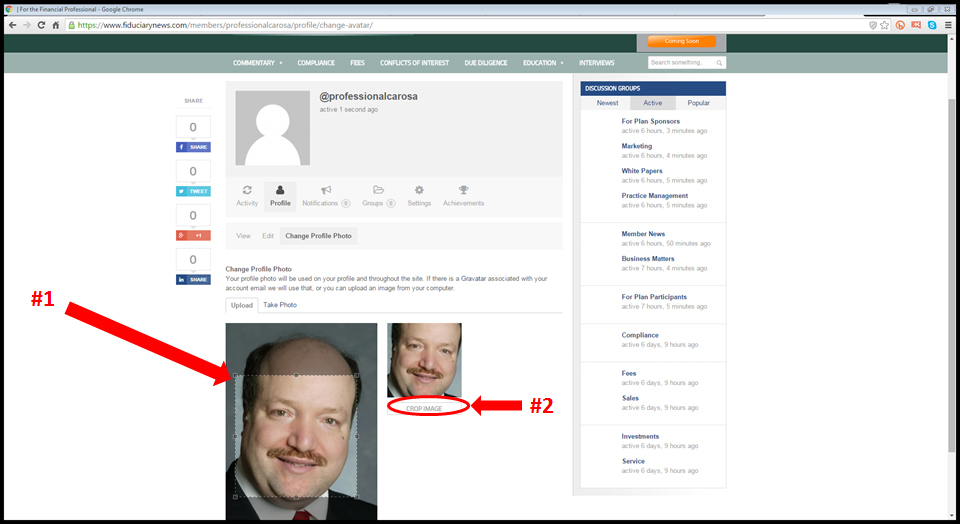
Step #5: The photo you selected appears. Crop it as desired. Since it needs to be a square, try to make sure you get as much of your face as possible so folks can recognize you when they see you in real life. See the example in the screen shot. Click “CROP IMAGE” when done.
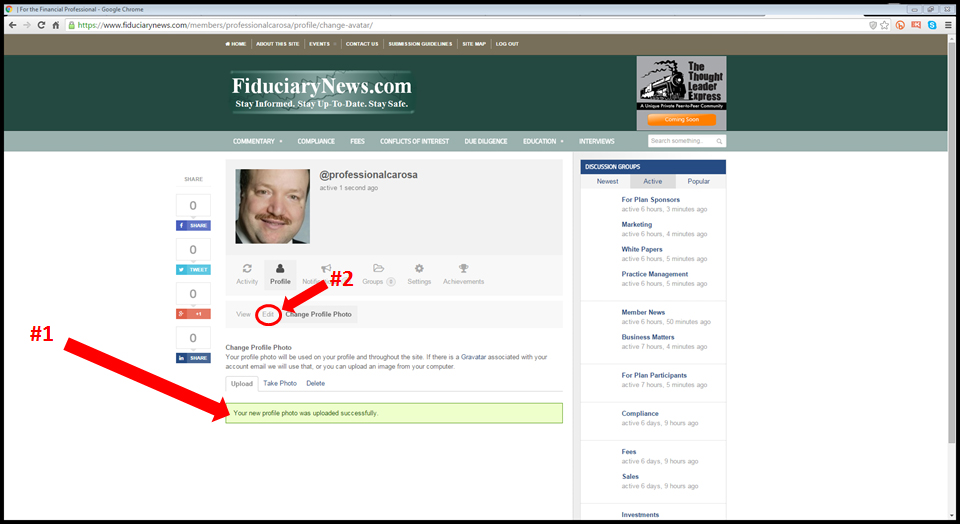
Step #6: You return to your Profile page and now you can see your photo (a green bar saying “Your new profile photo was updated successfully” appears. Ready for the bonus round? Hit “Edit” to update your profile fields.
![]()
![]()
Step #7: Surprise! You’ve just earned a badge and 2 points. What are the badges for? What do the points earn you? Well, you’ll have to just wait a bit before we tell you. For now, just click the “x” in the upper right corner of the badge notification and continue.
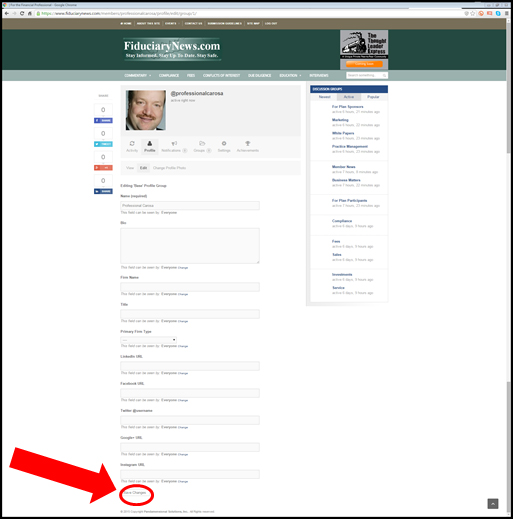
Step #8: Congratulations! You can now enter a brief Bio, Your Firm, Title, and Primary Firm Type as well as all your Social Media links. These will all be important for you to maximize the benefits you will be receiving as a member of this unique peer-to-peer community. Click “Save Changes” when you are done. Oh about those “Discussion Groups” you see in the right hand column – more on that next week. But here’s a hint: That’s why a complete profile will be important to you.
